I have tried just about every type of mold making and casting material over the years
and this is by FAR the very BEST you'll ever find.The detail is incredible.

Just look at the detail I was able to achieve using these techniques.
The cross on the right is the original on the left is the casting.
same with the vintage metal hinge. The owls on the top are the original.

Making your Molds
Here's what you'll need:
A non stick craft sheet
A old paintbrush - believe me you want a cheap one as it will no
longer be good for anything when your through.
Mold Builder By Castin Craft. (I purchased mine at Hobby Lobby with a 50% off coupon.)
So it was only around $8.00 and this stuff goes a long long way!!
A old cloth or paper towels for cleaning off that brush after each coat.
Some charms, old jewelry or anything you want to cast. metal, wood, glass.
just about anything will work.
If you have a precious keepsake you just can't bare to use
here's the perfect way to re-create them to use over and over.
castin craft sells a special sealer if your worried about damaging any precious items.
I have never used it though and haven't had any trouble with it.

Brush on a thin coat of Mold Builder,
being careful not to get any on the backside.
If you do wipe it off with a paper towel right away.

Set on the craft sheet and let dry

You'll want to do several pieces at one time.

remember to wipe off that brush each time!!!!

You can use a heat tool or hair dryer to speed up the drying process for the first few layers.
Do not overheat or you'll get bubbles.

For your second coat lay pieces on your craft sheet and paint another coat of the mold builder
making sure you paint an area around the piece about 1/2" .
Don't move piece from now on!!

Do all your pieces the same way and let dry.
You will need to repeat this process of coating your piece 8 to 10 times.
I know this sounds like a lot but its needed to support your casting.
Let each layer dry between coats.
It will take a couple of days to build up all these coats if left to dry naturally..

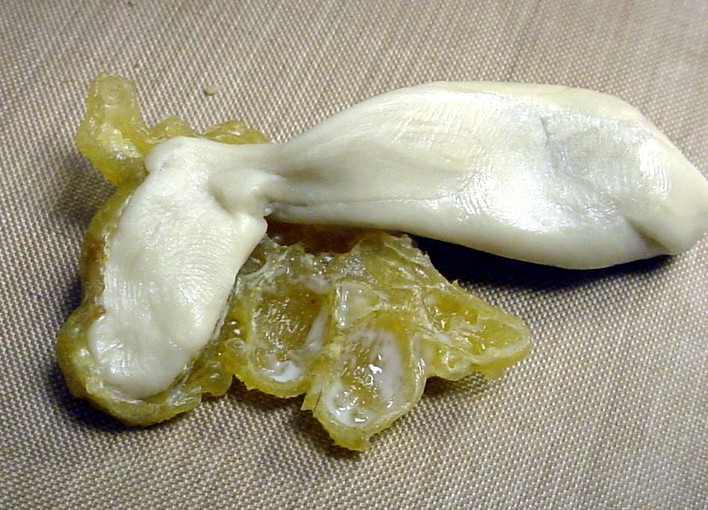
When your pieces have been coated and dry.
Peel them away from your original.
They will look like this. A kind of yellowish color.
They are very strong but flexible at the same time.
Making Your Castings
Now your ready to make your castings.
You will need a craft sheet. cheap baby lotion ,
The molds you created and Apoxie Sculpt.


This is a two part Epoxy Resin. A Resin and Hardner. Its super strong
It can be painted, sanded, drilled, cut, stained ,molded, carved
and its pretty much indestructible.
I've used it for years when I would make feet for my carved birds of prey.
You can find it online at Epoxy Sculpt or possibly at your local craft store.

You will need to use some baby lotion on your hands.
This will prevent the Apoxie Sculpt from sticking to your hands and your mold.
Rub a little lotion inside your mold coating it lightly.
It will work as a release but will not weaken or damage the Apoxie Sculpt

Now take one part of equal amounts of the Apoxie Sculpt.
Guesstimate what you will need to fill your pieces.
Remember this stuff goes a long way! Mix with your fingers until thoroughly mixed
begin to fill you mold with your resin pushing into mold with fingers.
You'll want to make sure you reach every nook and cranny.

Smooth over the back with a little lotion.
Now let it set for a few hours.
It will depend on how big your project is to determine how long it will take to dry.
I usually poke the back with my fingernail. If it dosen't go in its set.
Now peel the mold away from your resin
and your ready to sand edges if needed, paint, stain or finish as desired.
Your new molds can be used over and over again

I hope you found my tutorial helpful.
If so please let me know you stopped by.
If you have any questions feel free to ask
Call your friends and have a mold making party. Its a blast!!
Have Fun!!!!!


58 comments:
brilliant a fantastic tut and when I get back to crafting will certainly have to give this a go.
Chris x
I have no idea what I'd mold but I feel an overwhelming need to do this!
Thanks so much for this tutorial. I found it very helpful. Can't wait to give it a try. I do have many things I can not bring myself to use, this will be great.
Hugs Jackie
What a tutorial! Those pieces look just like metal, so detailed! I may have to get my hands on these products. Hope today is a little cooler for you!!! Hugs!
Thank you for the tutorial! I have a jar of that mold stuff just sitting in a drawer. I really need to pull it out and get to casting as there are several things I'd love to have casts of.
Smiles~
Marilyn
Really great instructions Lynn, thanks for sharing...making molds of things is simply wonderful, especially if you want to make something over and over...you're right the detail is incredible!
Absolutely fantastic Lynn, I really need to hunt out these products. I will sort when I get back from my weeks holiday. Loved your tutorial. Thanks so much. Tracy x x
Thanks for sharing the tutorial. I have never made a mold before that I remember.
OK, I WILL have to try this, you've made a believer out of me! Thanks so much for sharing!
~Linda
Very helpful , might give it a try!
I am flabbergasted at the results Lynn. You cannot tell which is which, that is amazing.
I wonder if those products are available in the U.K.
The possibilities are endless.
Wishes
Lynne
Thanks for the fabulous tutorial! i can't wait to try it.
Wow, you have certainly achieved some super results Lynn.
I'll have to have a look to see what is available here in the UK.
Toni xx
This looks sooooooooooooo messy, it must be fun! Must have some of it and start playing! Great results, I am off to look if I can get it somewhere here! Valerie
absolutely fantastic!!! thank you so much for sharing!!!
This is a fantastic post! Thanks for the tutorial! :D
Hugs,
Lynn your molds are very detailed and fabulous. What a wonderful way to duplicate precious pieces. Thank you so very much for sharing your expert techniques. Summer Sunshine Smiles...
Wow, Lynn! This is a great tutorial with wonderful results. You should show Suze Weinberg this stuff...she loves making molds and castings. Great work, as always!
Wow this looks fantastic,- I`m almost sure I can`t find those materials here, BUT I will try :-)
Thankyou so much friend, for your great tutorial.
Hugs,Dorthe
Wow...thank you for the tutorial!
I do have different kind of mold-material..
Hugs
Kikka
wow, thats great!!!!
wow amazin' lynn, looks fiddly but well worth it with those results
hugs and best wishes
Thank you so much for the tutorial! The results are stunning ... I now just need to find the ingredients here in the UK!
What a fantastic tutorial! Thanks so much for the tips and of course, now I'm going to have to try this. :-)
WOW! I need a bigger font because I need a bigger,
WOW!
You never cease to amaze me. I must bookmark this so I can get the materials and try this. Thanks!
I am sooo in love with this technique and plan on trying it soon!! Thanks Lynn!
Great tutorial Lynn. I probably would have to order all this online, unfortunately I don't have a Hobby Lobby here or anywhere in Candada that I know of. I would imagine you could make a few of those fractured dolls as well. What a great thing to make charms as well. hmmmm might have to get me some of this in the future. Thanks Lynne.
Lesley
Wow Lynn! That is just so great! Love it!
I won´t be using these products but read all the instructions anyway. Very clear and informative. I learnt a lot. Thank you.
I dont think that i have ever seen those products before, I think some google time is in order ... and as someone who has been lucky enough to receive some of your castings, i can say they are absolute perfection!!! You do an amazing job of them ... and like everything else, this post is full of inspiration!!!
Fantastic job! Your how to is perfect, just may have to finally try this one! Thank you
awesome! thank you for your generosity in sharing this technique! xo
By the look of your castings, I'd say that these products are top notch. It sure helps when you know what you are doing though. Your finished castings are just perfect! Thanks for the tips and instructions.
Lynn, your tutorial is fantastic and make me hungry:)I wish I could get my hands on these products, but here in Germany I can't buy such materials.
Gaby
Oh My Lynn!!. What fun, sounds like I better run down to Madison to Hobby Lobby!!! Thanks Lynn.
Hugs Vada
WOW! How cool is that. What a great tutorial. LOVE the way they look.
Hugs~
Wow.... those are amazingly detailed. Wonderful tute!
Most excellent tut Lynn! I'm going to have to try that mold builder I think. Thanks for sharing! Hugs!
I've been wanting to do this for a long time. I look in the stores but don't know what is best to use. Thanks so much for the tute!!!
Amazing moulds created. Thanks for the tut on how to create this. Absolutely amazing. Hugs Annie
Fantastic tutorial! Thinking of you, hope you are doing well. Hugs, Kim
what an amazing tutorial! thank you for sharing this with all of us! I hope you get some cooler temps!
Bought the mold builder to try my hand at this, now have to get the apoxy sculpt. I have been using mold and pour with so-so results, Can't wait to try this instead!
Thanks for the tutorial
Debbie
Thanks for that amazing tutorial! Amazing moulds have you created, really art works!
Wow- the detail you achieve is just fabulous!!! I think this is going straight on my 'to do' list.... Thanks for sharing your amazing talent!
Such a great tutorial, Lynn. Can't get any of the materials here, however, might consider ordering some in for nob. Thanks for sharing your knowledge. So generous of you. hugs Donna
What a great tutorial! Thanks for posting it. I hope I can get my hands on the needed supplies.
Thanks so much for the tutorial,Lynn.Have a great Sunday.
Hugs,
Marie
Really brilliant step by step tutorial Lynne. I don't know if we can get those products in the uk (probably not!!!) but those molded embellishments are definitely going to make me try!!
Hey Lynn! Oh this looks llke fun!!! I may have to try this!
gorgeous great idea
Oh boy Lynn! Thank you, thank you!
You're always teaching us the most awesome things ... talk about someone who needs to produce a book!
Aloha Lynn,
What an excellent tute! I'm impressed with the detail this molding technique puts out. I do want to give this a try.
Thanks so much for sharing.
Hugs..
Lynn, Love these castings so much that I pinned it to my pinterest board. Thanks for giving out your secret recipe for making these small treasures. I will be making some, but I doubt they will look as good as yours! xxxPam
This is something I've been wanting to do for a while now but felt lost regarding what products to use. Thank you, thank you, thank you for answering my questions about product as well as process. I will definitely be trying this very soon!
OK, I have my supplies and am ready to go! One question: have you tried using polymer clay in the molds? If so, what were the results? Just wondering.
i will try to craft my own design.. thank you for the tips...
I love your match box dresser it's very pretty! I was wondering did you make the feet to the dresser by creating your own mold or did you purchase the feet?
Thanks!
Ann
Post a Comment